| Fandango
06 Kite Buggy |
| The
Making Of The Fandango 06 Kite Buggy - by Popeyethewelder |
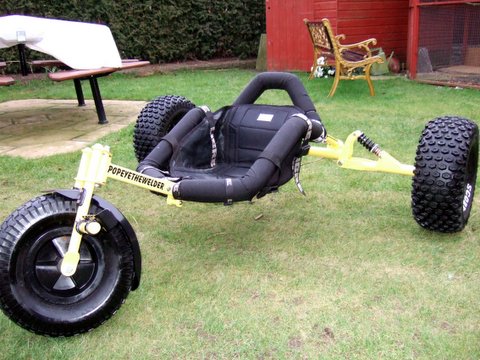
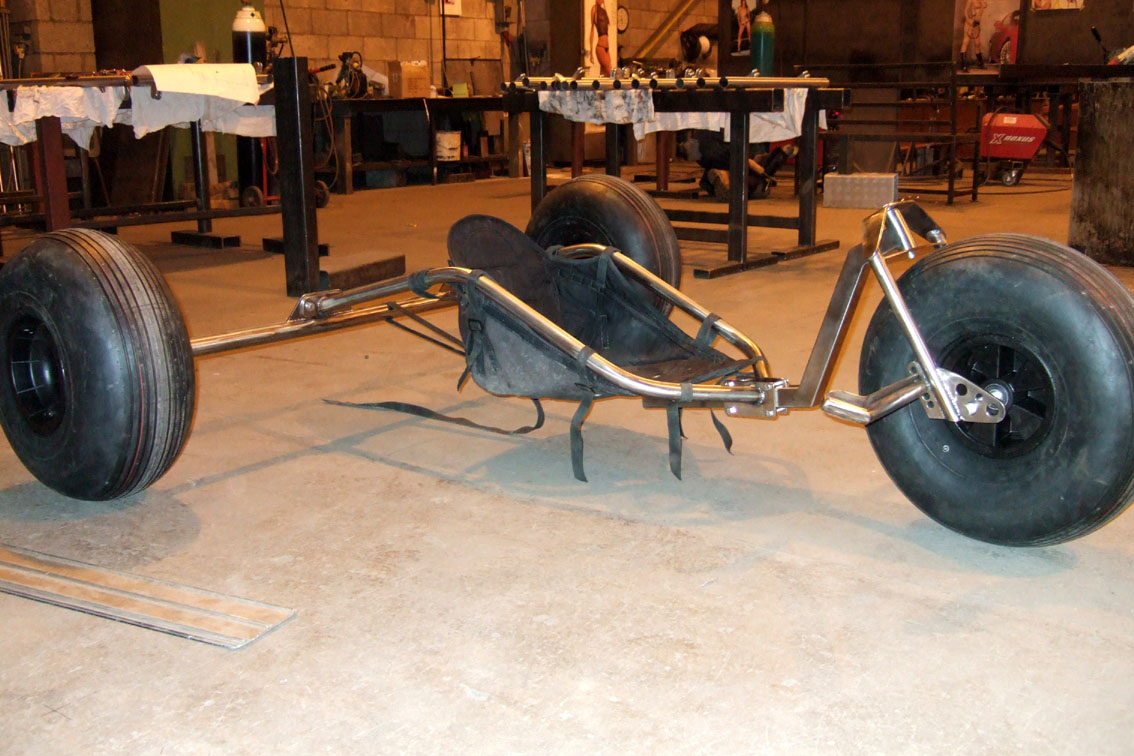
Ok
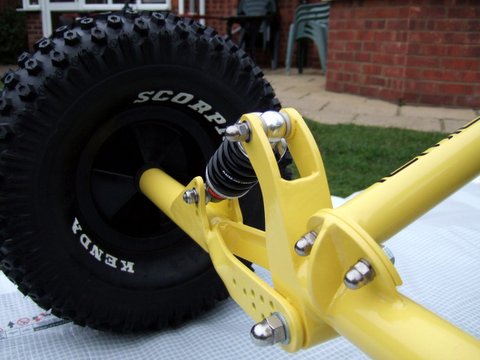
I wanted to make myself a buggy, I had bought a second hand PLxr
buggy with kenda scorpions on and thought it was fantastic. |
I
then started to take more notice of other buggys and could then
see ways of which I could improve what I had. |
| I
made the decision to sell the PLbuggy without the wheels as I
wanted those babies.
I have limited materials and equipment at work and have to work
with what I have got. |
|
I
trawled the internet and collected every single buggy picture
I could find that caught my eye, my idea was to take the parts
I like off of these other buggys and try to improve on then in
some way if at all possible. |
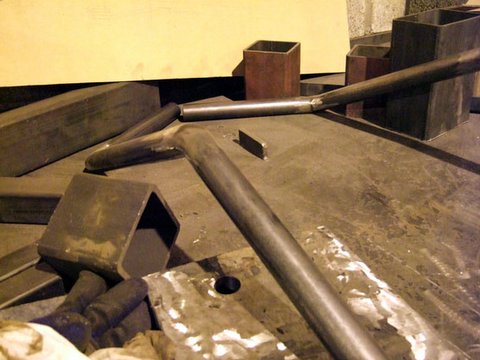
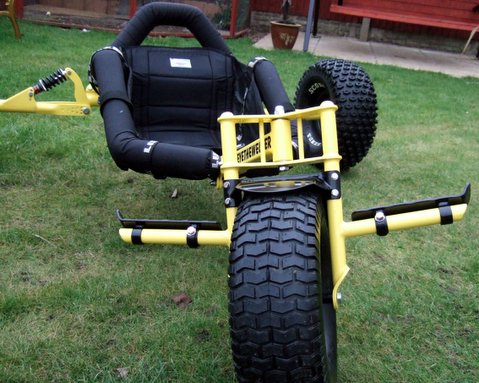
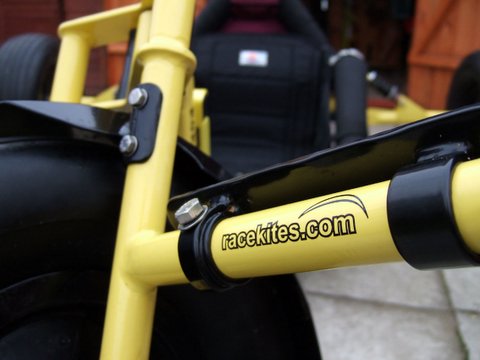
| I
tried bending the 33mm side rails but wasn't happy with the slight
kinking on the inside of the bends, so reluctantly I used ready
made elbows, and welded the straight cut lengths to them , at
least that way I could make sure the angles were exactly what
I wanted. |
|
| |
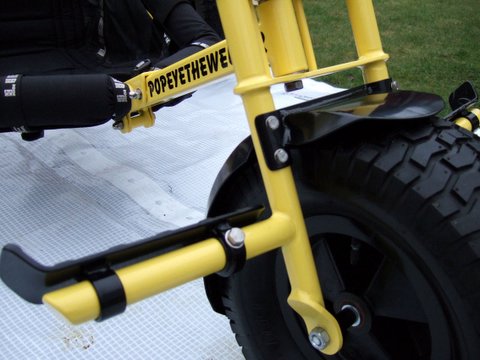
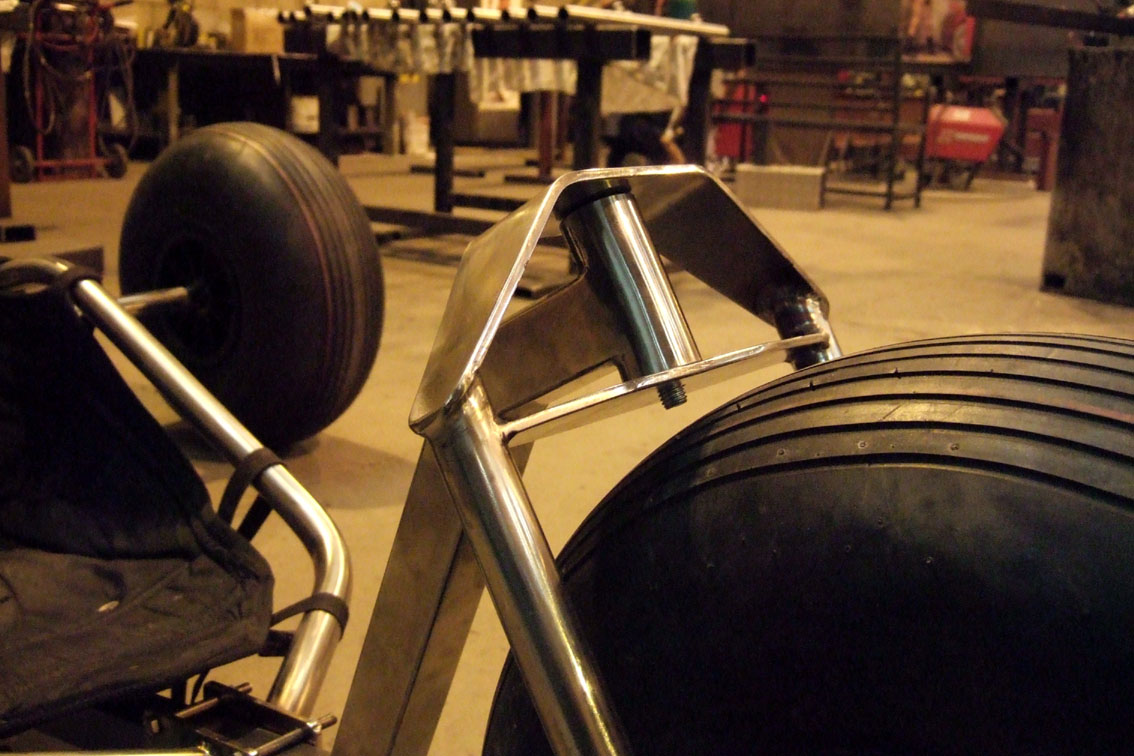
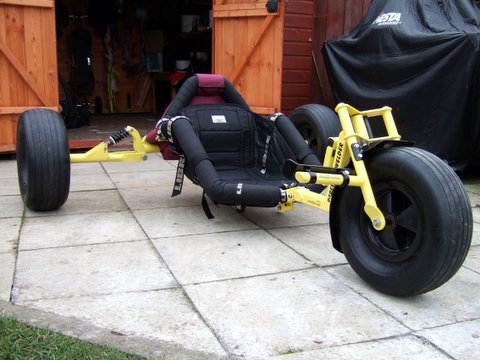
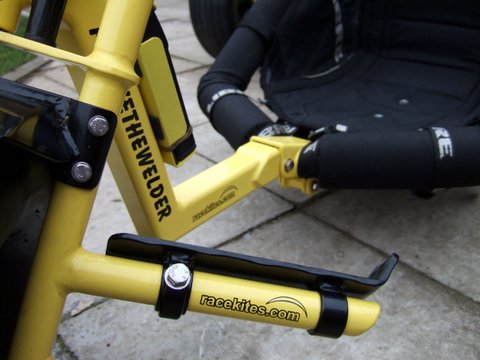
Originally
I had straight 27mm tube for foot pegs coming off these forks
with a round plate on the end, but then decided I wanted something
better than that, and made two cheque plate foot plates, on the
back of the foot plates a welded two pieces of 33mm tube to slide
over the foot pegs, I had already made a slot in each foot peg
to take a 8mm bolt that way the foot plates would turn on the
round pegs about 20 degrees.
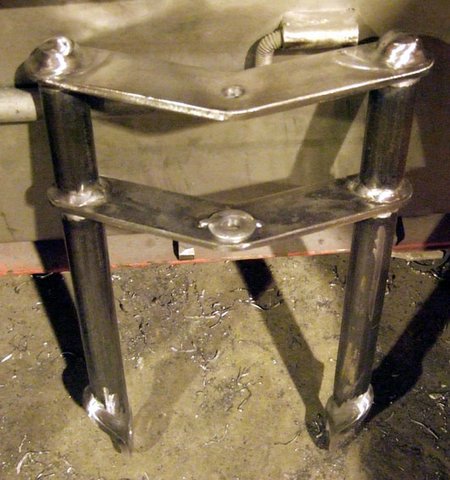
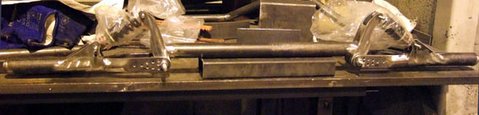
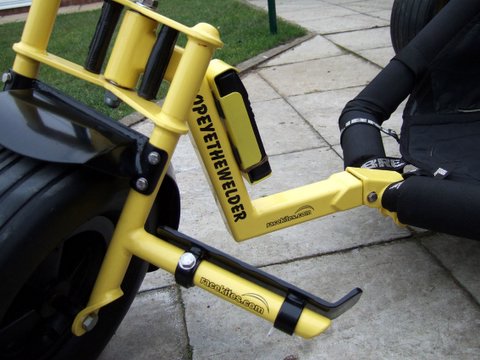
I
stated work on the forks making the fork tubes from 27mm steel
tube, I wanted the top and bottom plates angled as I had seen
pics of those and liked them. |
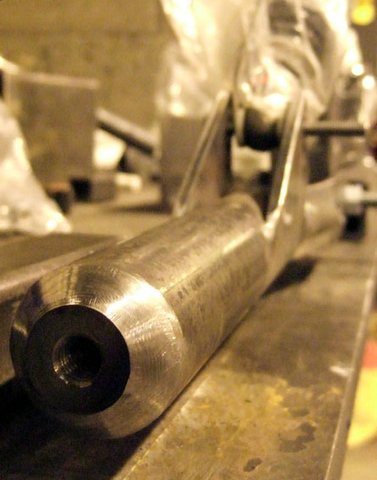
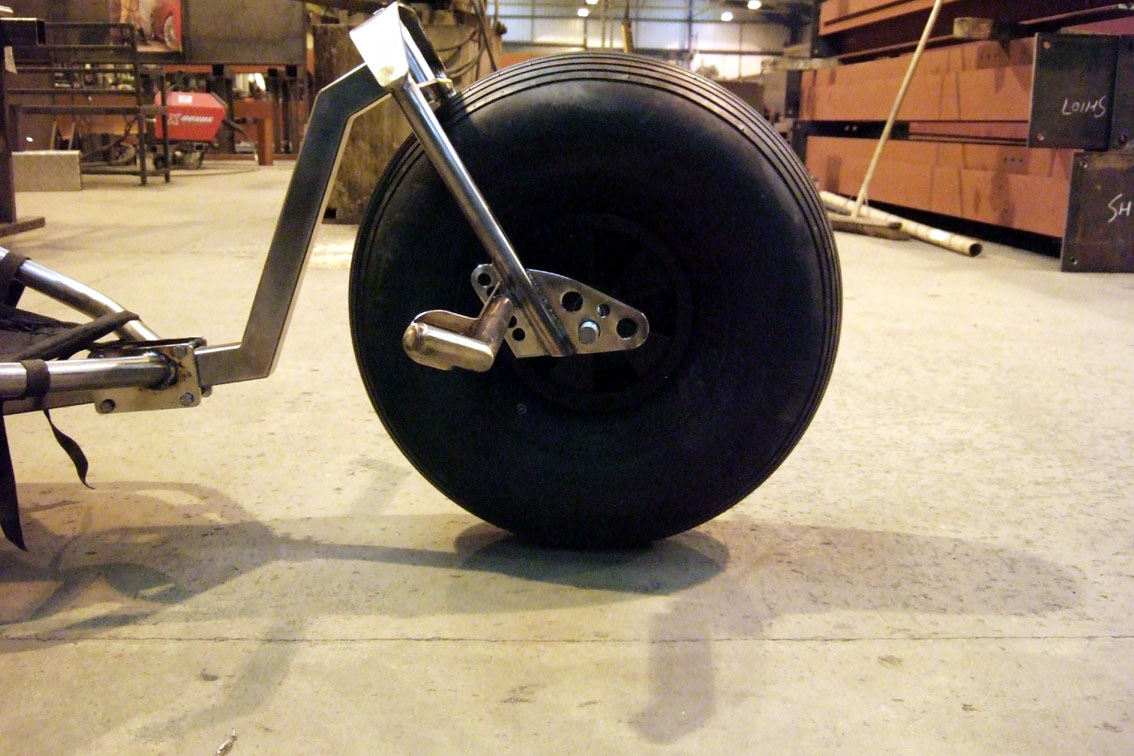
| The
main tube on the axle is 42mm, and I could go on and on about
all the little lugs & bits that I had to fab to get the desired
effect |
|
| |
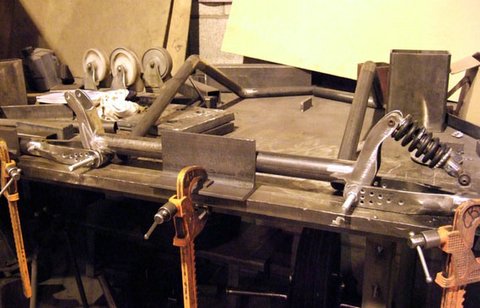
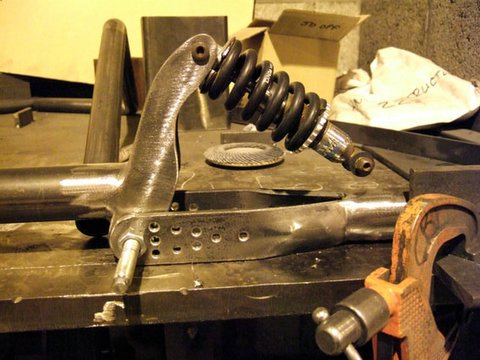
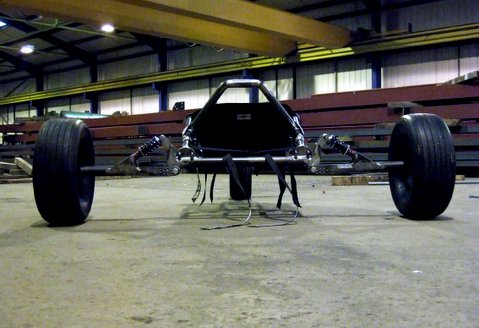
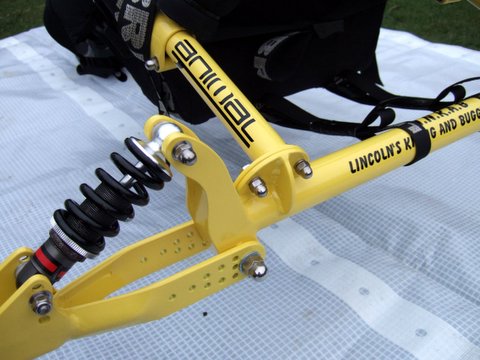
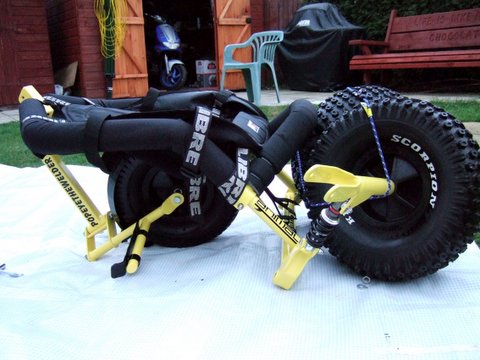
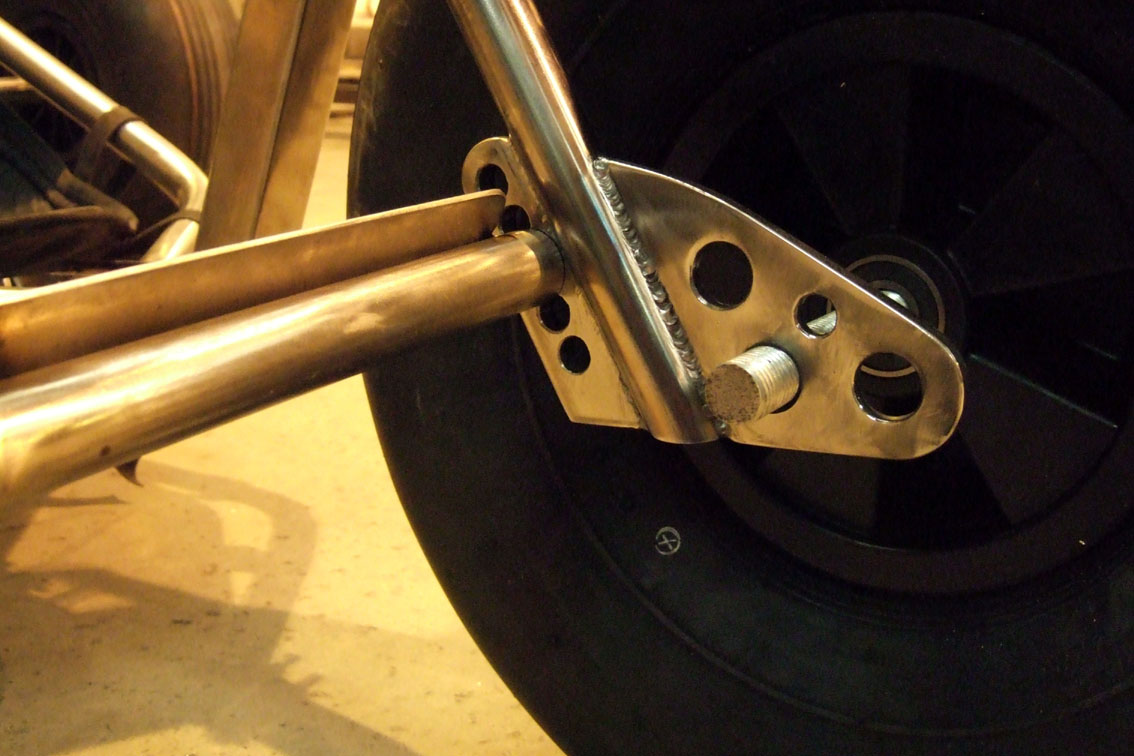
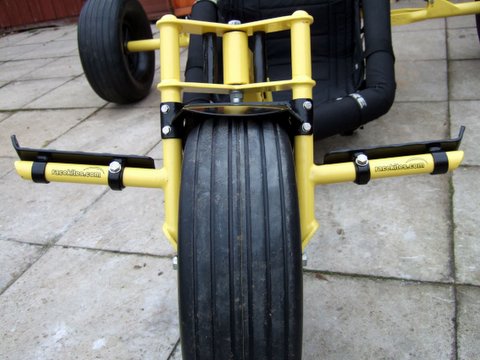
The
axle, obviously took the longest to make, and first I had to find
some quality shocks, I found some Ballistic shocks that are about
£70 each new |
| |
|
| |
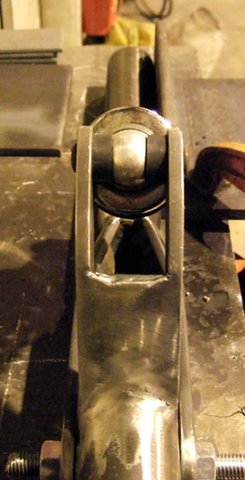
I
looked at the PL suspension set up and didn't like the straighness
of the shock housing, so after making templates and trials I ended
up with the housing angled towards the wheels. |
| |
|
| |
|
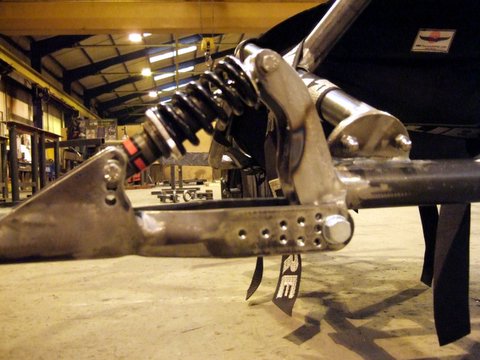
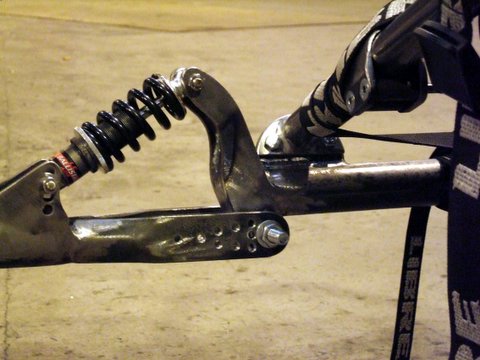
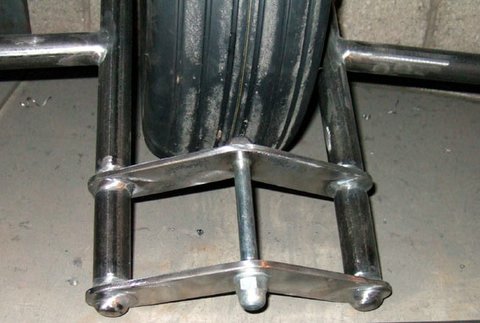
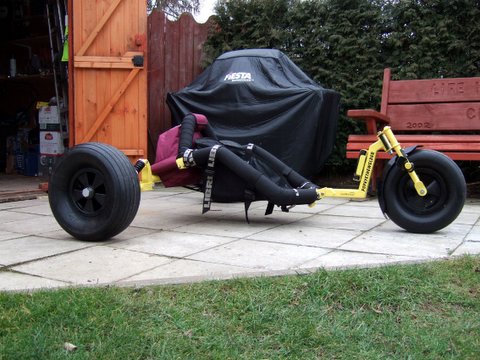
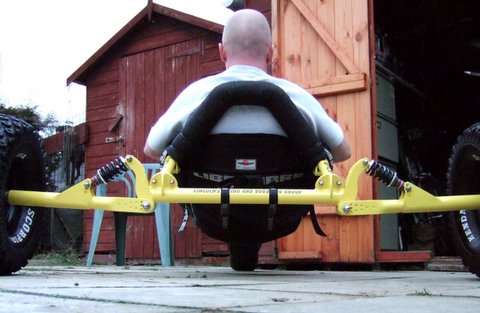
Lastly,
the axle and wheels I am very pleased with.
The
end result, and in fact, it is the back end that to me, that
makes this buggy a good one.
The
axle is about 1800mm long overall, I only have to take the bottom
12mm bolts out of the housing and the extra axle parts with
the wheels on will fold virtually to any position, swinging
on the shock.
|
|
| |
|
| |
|
| |
|
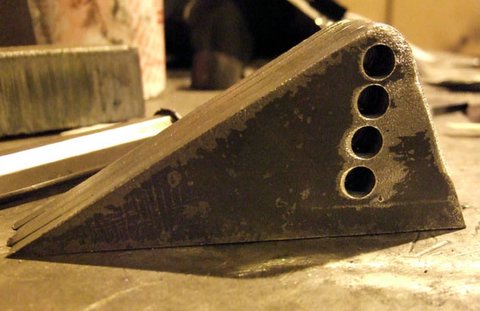
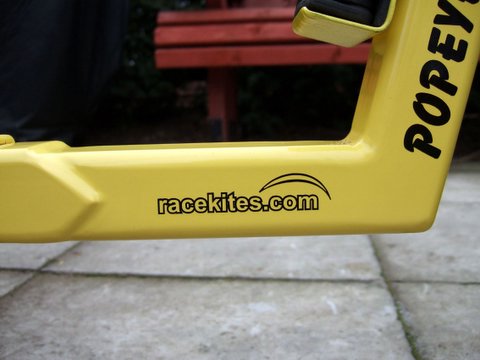
| The
original downtune is 40mm box and I think what is unique about
this buggy is the way I have joined the side rails together. |
|
| |
Made
from a piece of 50mm box with the bottom cut out basically, I
then added lugs at the bottom to attach the down tube, |
| |
|
| |
|
| |
|
| |
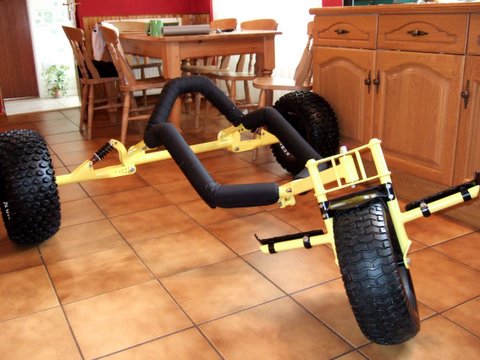
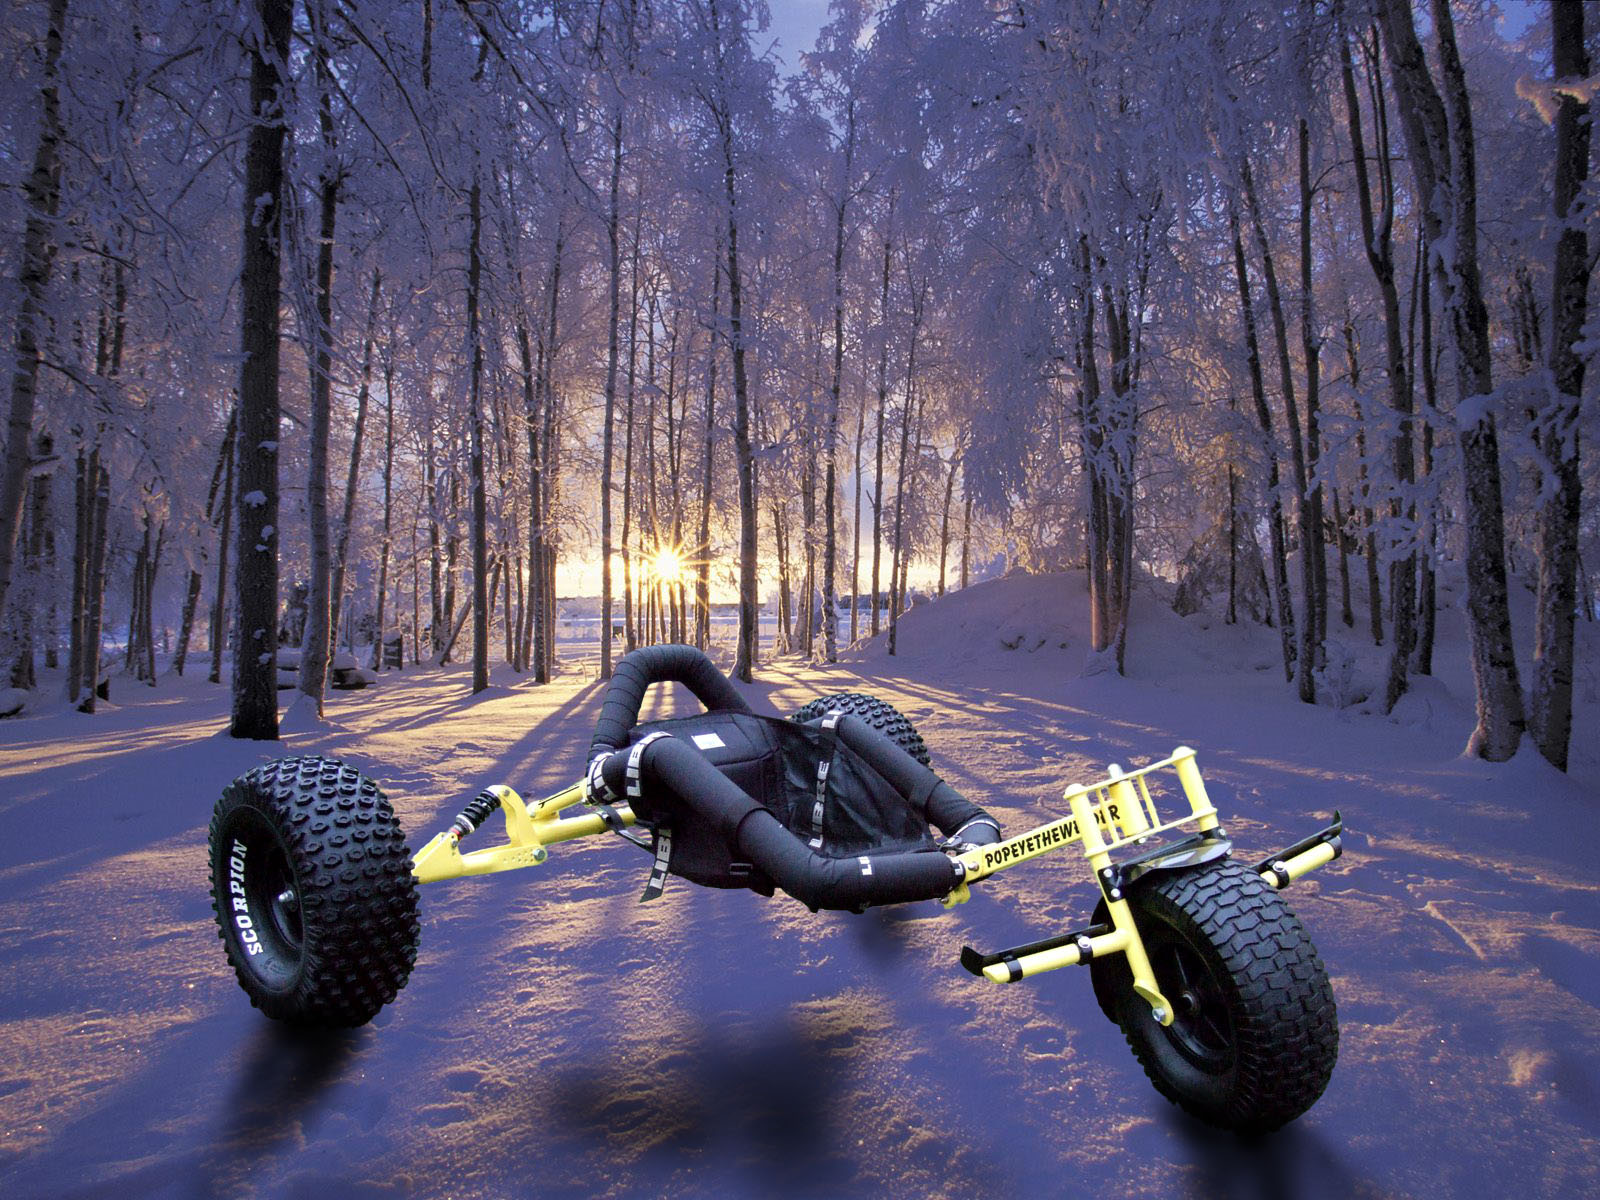
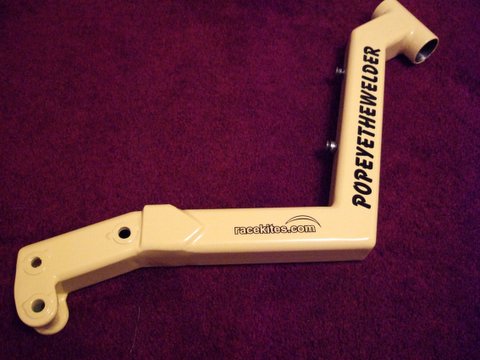
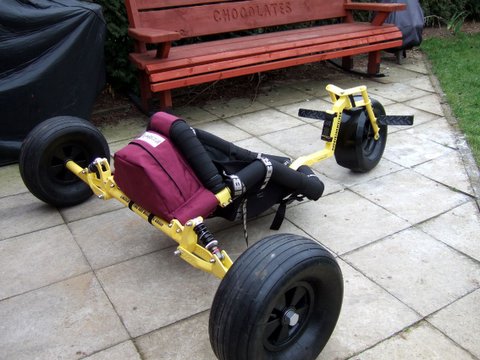
I
want this buggy to be able to fold down quite small, so after
taking the front bolt out the whole front end swings under the
seat. I have now made a swan neck and cant wait to try that out
, it lowers the buggy by about 80-110mm and looks a lot more steamlined.
|
| |
|
| |
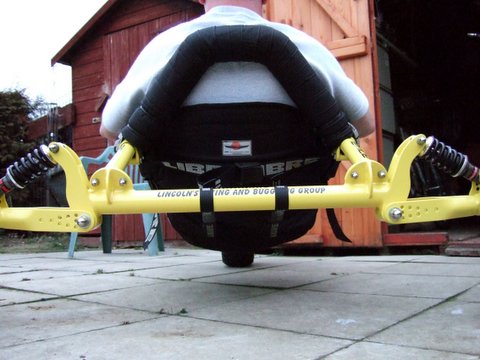
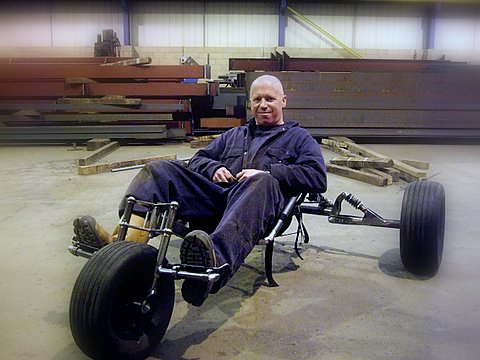
The
first run was really good, although it was for only half an hour
due to bad weather, it is like sitting in an armchair soooooooo
comfy, the seat is slighty tilted back, which I think is a nice
position to fly a kite in, the swan neck will make it into more
of a speed machine, for which I am lookin forward to trying out.
|
| |
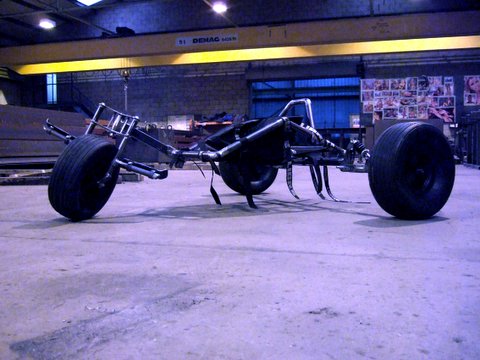
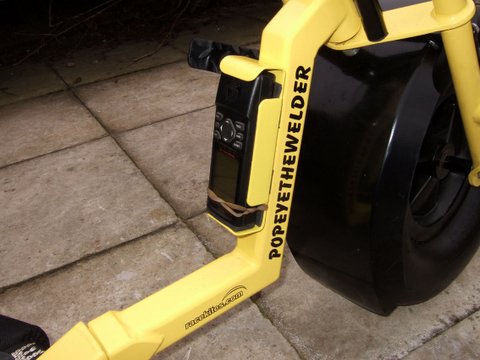
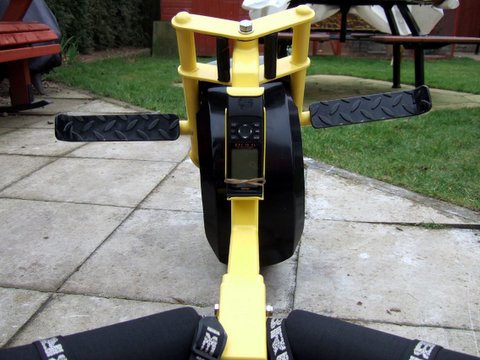
Pictures
below show the Fandango Bug Modified with a Swan Neck,
all metalwork fabrication made by Popeythewelder! |
| |
 |
 |
 |
 |
 |
 |
 |
 |
 |
 |
 |
 |
 |
|
| |
| |
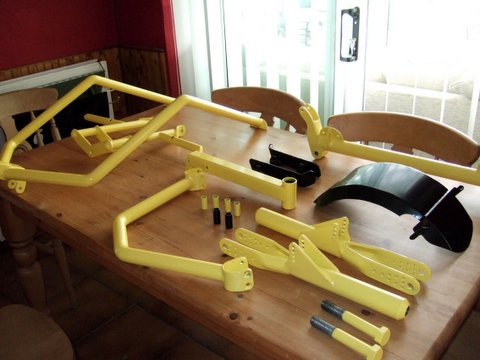
Techincal
Specs:
Dimensions
Forks 27mm tube with 6mm plates at either side of the headstock,
12mm front axle.
Swan neck now added pictures to follow shortly
Side rails 33mm
Rear axle 42mm
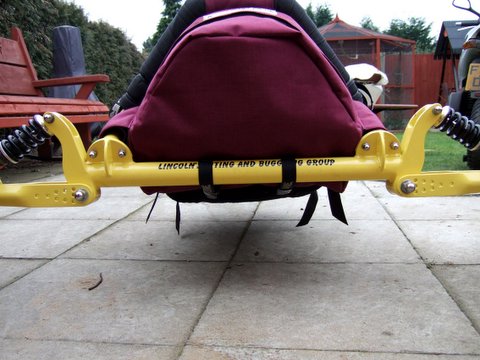
Back rest 32mm
Foot pegs 27mm, with 4.5mm durbar foot plates
Weight
Axle=14lb 6.35kg
Siderails=11lb 5kg
Downtube=6lb 2.72kg
Backrest=3.5lb 1.58kg
Mudguard and Foot plates=2.5lb 1.13kg
Total Buggy wieght=92lb 41.73kg with wheels and eveything on.
Build time although a lot of this time was developement work
about 30 hrs
|
|
| Images
and text displayed by kind permission of Popeyethewelder |
| Fandango 06 Copywrite
Popeyethewelder© |
| |